- Home
- /
- Article

Webex App | Edit space settings
 In this article
 Feedback?
You can change a space picture from a round icon with the first letter of the space name, by uploading a picture for the space. Or, if you change the space name, the icon letter changes too. You can also add a cover image to the space, to add a personal touch.

You can edit any space settings except the General space.
But if you’re a member of a moderated space, then you can only view space settings and not edit them.
Your administrator may select a default cover picture for spaces in your organization, and you won't be able to change your cover image.
Supported Graphic Formats and Sizes
You can use lots of common graphic formats for your photo: .jpg, .png, .gif, or .bmp. The file has to be under 10 MB, though.
| 1 |
Go to Messaging |
| 2 |
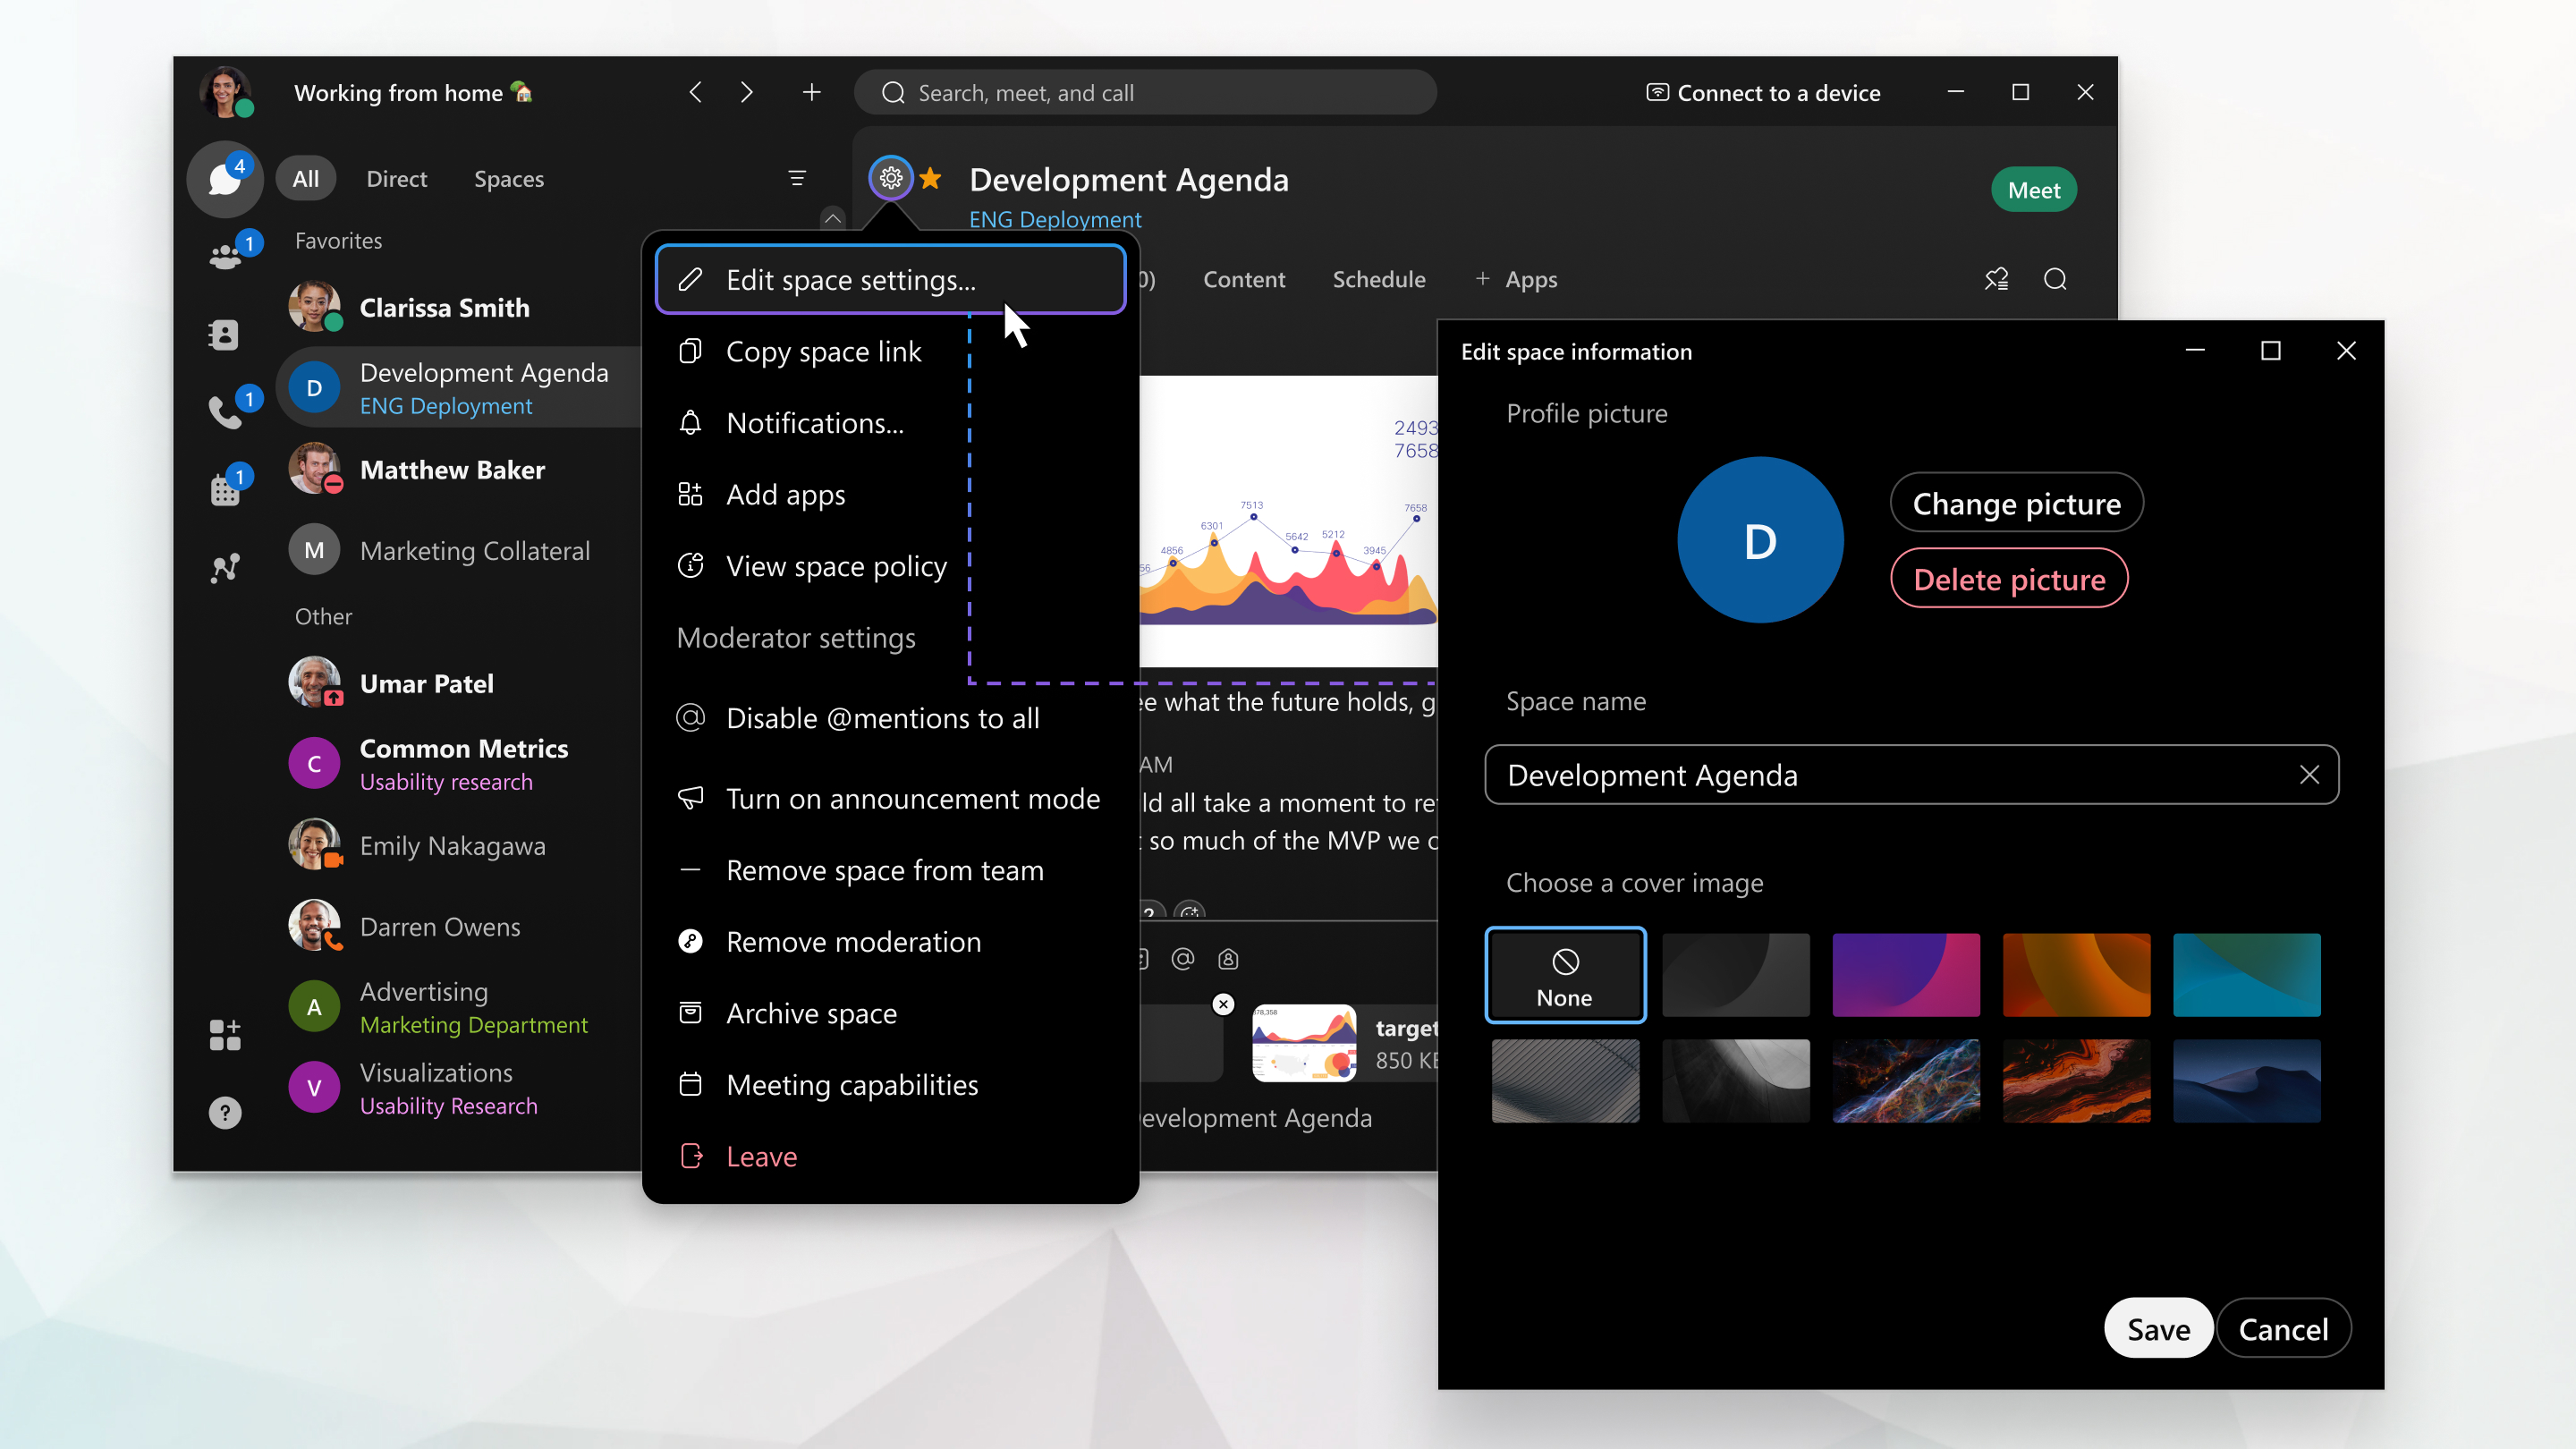
Click Space Information If the space is moderated you'll see View space settings, and you won't be able to make any changes. |
| 3 |
Go to Space picture and click Upload picture to upload a new picture or Change picture to change an existing space picture. |
| 4 |
Click on the Space name to rename the space. |
| 5 |
Choose a cover image—select a cover image for the space. |
| 6 |
When you've made your changes, click Save. |
| 1 |
Go to Messaging and select a space. |
| 2 |
Tap the activity menu |
| 3 |
Tap edit to add a space image and choose either Take Photo or Choose Existing Photo. |
| 4 |
Tap the space name and enter a new space name. |
| 5 |
Tap Done to save your changes. When you rename a space, the previous name appears as a note in the message area, so you can see a history of the space name changes. |
| 1 |
Go to Messaging and select a space. |
| 2 |
Tap the activity menu |
| 3 |
Tap the space icon, then tap Select Space Image to choose a new picture, crop the image and tap Save. |
| 4 |
To rename the space, tap the space name and type in the new name. When you rename a space, the previous name appears as a note in the message area, so you can see a history of the space name changes. |
| 1 |
Go to Messaging |
| 2 |
Open the space settings |
| 3 |
To update the space name, click the name and type a new name. If you don't want to set the space photo, click Done. |
| 4 |
To set the space photo, click the space photo. If the space photo hasn't been set, then the space photo is the circle that has the space initials in it. |
| 5 |
If the space already has a photo, click Upload space photo to change the photo. Or if you don't want the space to have a photo anymore, click Remove Photo to remove the space photo. If the space doesn't have a photo set, you'll be prompted to upload a photo without clicking Upload space photo. |
| 6 |
Click Done. |

 , tap
, tap  and choose a space from the space list.
