You can find information about your device or change your device's settings, in the Settings menu.
Settings with a locked symbol beside them can't be accessed until your administrator unlocks them from Control Hub.
If you choose a locked setting, a dialog box appears. To unlock these settings, contact your administrator. Read more about locked settings: locked settings . |
Not all settings are available on all products. Some of the items on the list may or may not be present on your device. |
Settings menu overview (RoomOS 9.15)
-
About this device : View the setup and Room OS version information for your device.
-
Issues and diagnostics : See if there are any issues with your device, send logs, check your Webex connetion detail, or perform a Webex connectivity test.
-
Language and region
-
Language : Select a language for the user interface.
-
Time zone : Select your local time zone.
-
-
Advanced features
-
Face recognition name labels : When enabled, the remote participants can see the name labels. Read about it here .
-
HDMI out : When enabled, you can connect a monitor to the device.
-
-
In-meeting chat notifications : Enable or disable the chat notifications, and decide how you want them to show up on your device. Reed more about in-meeting chat notifications here .
-
Audio
-
Bluetooth : Connect to a separate audio device using a Bluetooth connection. Read more about Bluetooth® Headsets for Board, Desk, and Room devices .
-
Ringtone and volume : Set the default volume for ringtone and calls.
-
Music mode : By enabling music mode you can sing and play musical instruments over your device. When enabled you can find Music mode in the top bar. See the article on music mode for more information.
-
-
Manage Web Apps : Add web apps on your device's home screen. Read about it here .
-
Screen and video
-
Meeting zone : Configure a meeting zone to ensure that only people within the relevant area (meeting zone) are in focus, minimizing districtions from outside the zone.
-
Open AirPlay settings : Check the AirPlay settings. See Wireless sharing with Airplay for more information.
-
Snap to whiteboard : Set up your MX or SX series device to automatically frame your whiteboard when someone speaks next to it. For more, see Snap to Whiteboard .
-
Camera view : You can find instructions on how to manually adjust the camera angle to ensure that you get a good view of the meeting room when you have a Room Kit or a Quad Camera.
-
Connections : See the inputs and outputs connected to your device. You can share your laptop screen using an extra HDMI or USB-C cable according to which device you have.
-
Screen adjustment : Adjust the overscan or display settings on your external screen so that you get the best image when viewing video and graphics. The screen adjustment test helps you to instantly see the results of the adjustments you make on your external screen and ensures that the image is cropped correctly.
-
Default camera position : Set the default camera position for future calls.
-
-
Network and service
-
Device activation :
-
Choose Cisco Webex and follow the on-screen instructions to activate your device with Cisco Webex.
-
Choose Other services , if you want to activate your device using another call service.
-
-
Network connection : Configure your device's network settings or select a network connection using Ethernet or Wi-Fi. For more information, see Use Wi-Fi on Board, Desk, and Room series .
-
-
Touch panel setup
-
Network connection : View or change the network connection details for your touch controller.
-
Pair/Unpair touch panel : Pair or unpair the touch controller from the Board or Room device. Afterwards, you can pair the touch controller to a new device by providing the connection details and credentials. To pair again with the current device, a factory reset is required. Read more about connecting a touch controller to Board and Room series device .
-
-
Restart : Restart your device.
-
Factory reset : If you reset your device to its factory settings, you lose your current registration. You cannot undo a factory reset. After a factory reset, you need a new activation code to use your device.
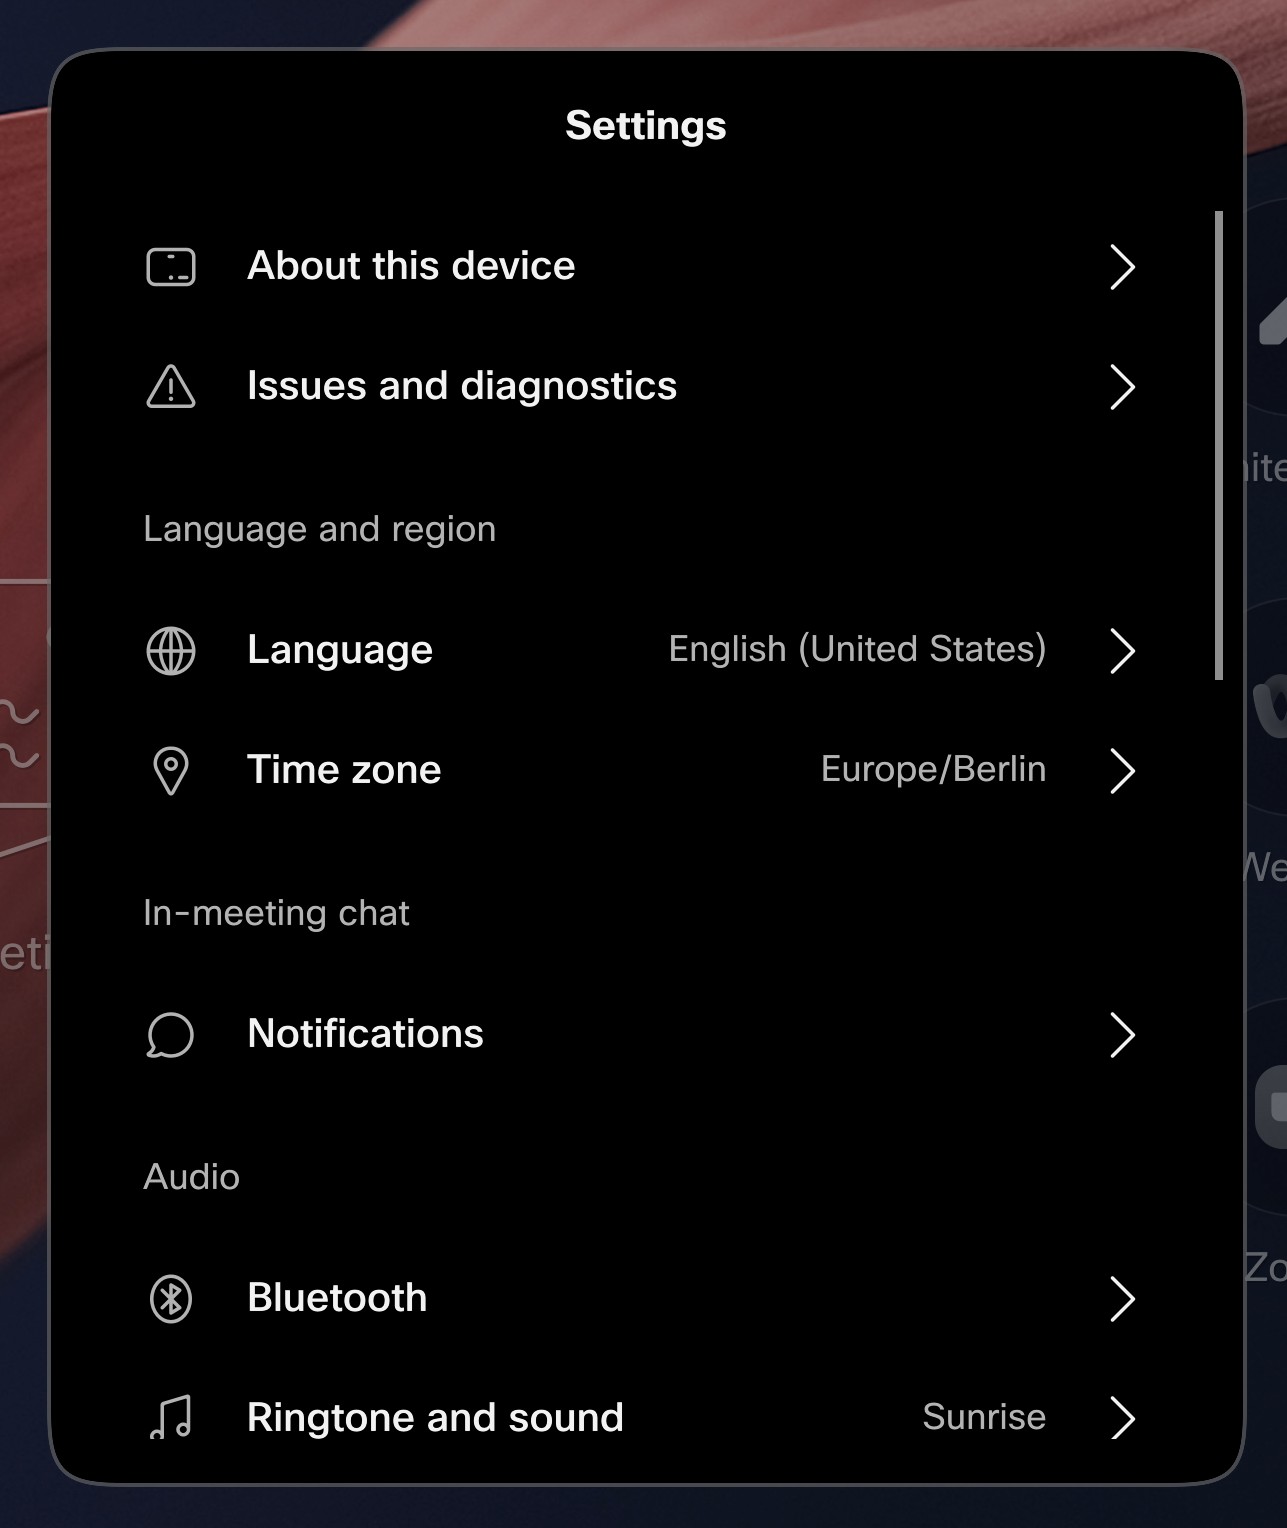
Settings menu overview (RoomOS 11)
-
About this device : View the setup and Room OS version information for your device.
-
Issues and diagnostics : See if there are any issues with your device, send logs, check your Webex connetion detail, or perform a Webex connectivity test.
-
Language and region
-
Language : Select a language for the user interface.
-
Time zone : Select your local time zone.
-
-
Audio
-
Bluetooth : Connect to a separate audio device using a Bluetooth connection. Read more about Bluetooth® Headsets for Board, Desk, and Room devices .
-
Ringtone and sound : Set the default volume for ringtone and calls.
-
Microphone : By enabling music mode you can sing and play musical instruments over your device. When enabled you can find Music mode in the control panel. See the article on music mode for more information.
-
-
Screen and video
-
Camera : You can find instructions on how to manually adjust the camera angle to ensure that you get a good view of the meeting room when you have a Room Kit or a Quad Camera.
Meeting zone
-
Meeting zone : Configure a meeting zone to ensure that only people within the relevant area (meeting zone) are in focus, minimizing districtions from outside the zone.
-
Default camera position : Set the default camera position for future calls.
-
-
Display : See the inputs and outputs connected to your device. You can share your laptop screen using an extra HDMI or USB-C cable according to which device you have.
-
AirPlay : Check the AirPlay settings. See Wireless sharing with Airplay for more information.
-
-
Network and service
-
Device activation :
-
Choose Cisco Webex and follow the on-screen instructions to activate your device with Cisco Webex.
-
Choose Other services , if you want to activate your device using another call service.
-
-
Network connection : Configure your device's network settings or select a network connection using Ethernet or Wi-Fi. For more information, see Use Wi-Fi on Board, Desk, and Room series .
-
-
Manage Web Apps : Add web apps on your device's home screen. Read about it here .
-
Intelligent and automated capabilities
-
Automated services
-
Voice Assistant : Enabling Voice Assistant allows you to interact with devices by using your voice. Read more about Voice Assistant here .
-
Proactive Join : Allows Voice Assistant to ask if you'd like to join a scheduled meeting at the meeting start time.
-
Face recognition name labels : When enabled, the remote participants can see the name labels. Read about it here .
-
-
-
Touch panel setup
-
Network connection : View or change the network connection details for your touch controller.
-
Pair/Unpair touch panel : Pair or unpair the touch controller from the Board or Room device. Afterwards, you can pair the touch controller to a new device by providing the connection details and credentials. To pair again with the current device, a factory reset is required. Read more about connecting a touch controller to Board and Room series device .
-
-
Restart device : Restart your device.
-
Factory restart : If you reset your device to its factory settings, you lose your current registration. You cannot undo a factory reset. After a factory reset, you need a new activation code to use your device.
-
Switch to old settings menu : Switch back to the old settings menu.
How to open the Settings menu
To open the Settings menu:
Board, Desk Series: swipe from the right side of the screen, or tap the button to open the control panel. Then tap Device settings .
Room Series: tap the button on the upper right corner of your touch controller's home screen, to open the control panel. Then tap Device Settings .
DX70, DX80: tap the device name at the top left corner of the home screen, and then tap Settings .
MX, SX: tap the system name at the top of the controller's home screen, and then tap Settings .