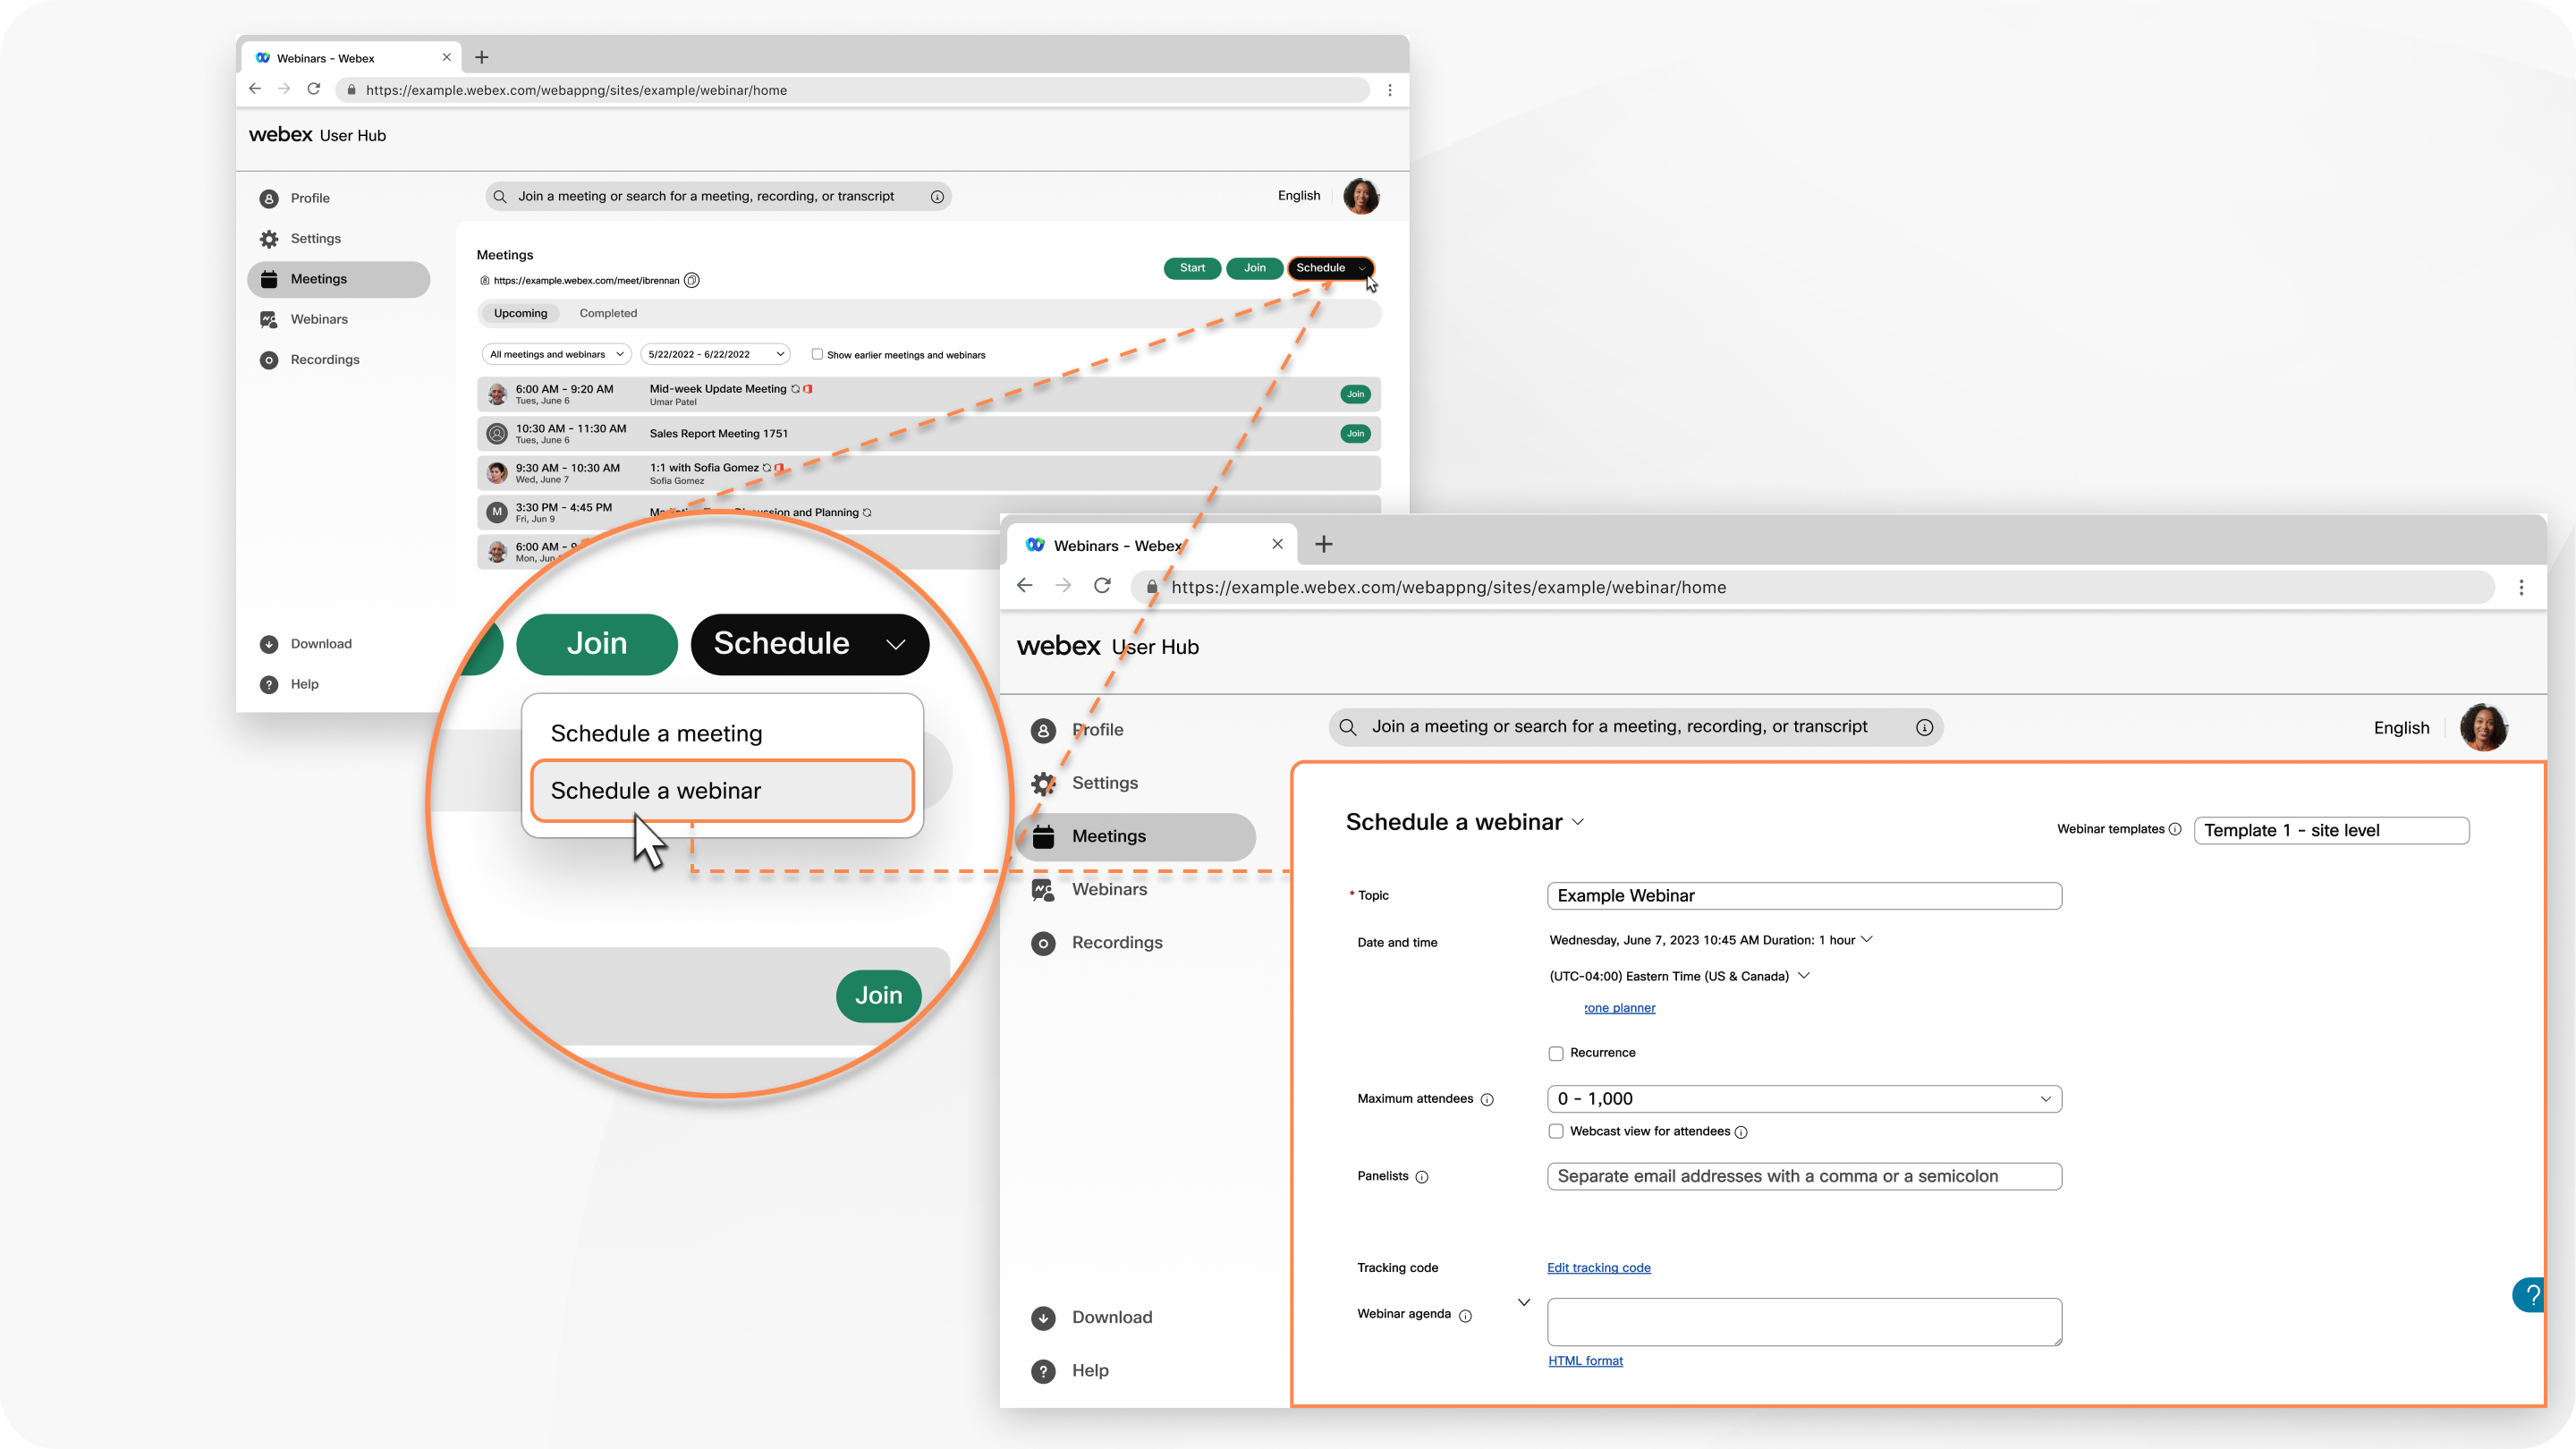
예약 Webex 웨비나
 피드백이 있습니까?
웨 비나에 초대할 수 있는 사용자의 수는 구입한 라이센스에 따라 다를 수 있습니다. 웹 세미나에는 최대 10,000명까지 참여할 수 있습니다. 1만 명 이상의 참석자를 대상으로 웹캐스트 형식으로 웨비나를 예약하세요.
웹캐스트 보기의 웨비나는 정부용 Webex에서 사용할 수 없습니다.
웨비나 일정을 예약하면 확인 이메일과 참석자에게 전달할 이메일을 받게 됩니다.
| 1 |
사용자 허브에 로그인하고 회의 탭을 클릭한 다음 일정 드롭다운 메뉴를 클릭하고 웨비나 예약을 선택합니다. |
| 2 |
(선택 사항) 저장된 웨비나 템플릿이 있는 경우 웨비나 템플릿 드롭다운 메뉴에서 하나를 선택하세요. |
| 3 |
다음 정보를 제공하여 기본 항목을 추가합니다.
|
| 4 |
보안 섹션 에서 다음 정보를 추가합니다.
|
| 5 |
오디오 연결 옵션 섹션에서 다음 정보를 추가합니다.
|
| 6 |
고급 옵션을 클릭하여 실습 세션, 자세한 세션 활성화, 기존 시리즈 또는 생성하는 새 시리즈에 이 웨비나 추가, 동시 해석 켜기, 등록 요구, 이메일 알림 보내기 등. |
| 7 |
웨비나 일정을 예약하려면 일정 을 클릭하세요. 웨비나를 예약하면 참석자들은 기본 템플릿을 사용하여 자동으로 이메일 알림을 받게 됩니다. 이메일 템플릿을 사용자 지정하고 나중에 알림을 보내려면 일정 클릭 후 모든 참가자에게 이메일 초대 자동 전송] 을 선택 해제한 다음 Webex 웨비나에서 이메일 템플릿 사용자 지정의 지침을 따르세요. 웨비나 일정을 예약한 후 캘린더에서 해당 웨비나를 선택하고 다음 중 하나를 수행할 수 있습니다.
|
| 8 |
웨비나 일정을 예약한 후 |
| 9 |
웨비나 참석자들을 초대하기 위해 참석자들에게 전달할 이메일을 받게 됩니다. |

 을(를) 선택할 수 있습니다.
  를 클릭하여 .ics 파일을 다운로드하거나 Google 캘린더 또는 Microsoft Office 365 캘린더에 웨비나를 추가할 수 있습니다.
